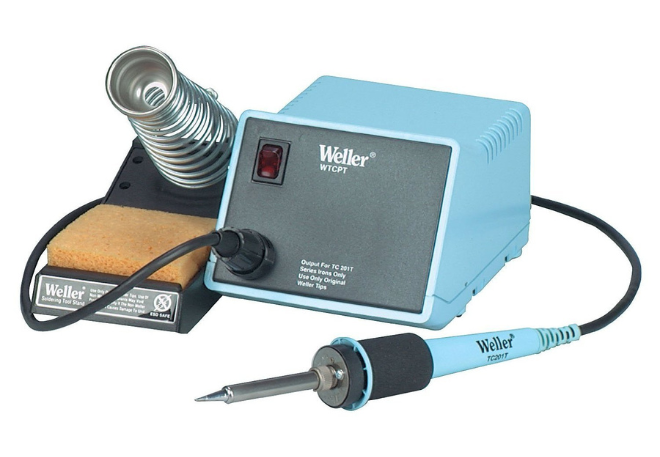
Weller Soldering Iron: A Comprehensive Guide to Mastering Your Soldering Skills
Soldering is valuable, particularly for those interested in electronics and DIY projects. One of the most renowned brands in the industry is Weller, known for producing high-quality and reliable soldering irons. This article provides a comprehensive guide to mastering your soldering skills using a Weller Soldering Iron, ensuring you have the knowledge to tackle any soldering project confidently.
Understanding the Basics of Weller Soldering
Before diving into the technicalities of soldering, it’s crucial to understand what makes Weller Soldering Irons stand out. Weller has been a market leader in soldering equipment since 1959, offering a wide range of products to suit different needs, from hobbyists to professional technicians. Their soldering irons are known for precision, durability, and exceptional temperature control, ensuring accurate and reliable soldering.
Choosing the Right Weller Soldering Iron for Your Needs
Selecting the right soldering iron is vital to achieving the best results in your projects. Weller offers various models, including the Weller WLC100, WESD51, and WX2, each designed for specific applications. For beginners, the Weller WLC100 is a great starting point, providing 40 watts of power and an adjustable temperature range. For more advanced users, the WESD51 offers digital temperature control and a higher power output, ensuring precision in more demanding projects.
Recognizing the Importance of Proper Soldering Technique
Mastering soldering requires understanding and practicing the proper technique. The key steps in soldering include:
- Preparation: Ensure your Weller soldering iron is clean and tinned. Clean the soldering tip with a wet sponge or brass sponge to remove any oxidation and apply a small amount of solder to coat the tip, enhancing heat transfer.
- Heating the Components: Place the tip of the soldering iron on the joint, making contact with both the component lead and the solder pad on the PCB. Allow time for the components to heat up evenly.
- Applying Solder: Feed the solder into the joint, not onto the soldering iron tip. The heat should melt the solder, allowing it to flow smoothly around the joint.
- Cooling and Inspection: Remove the solder and the iron simultaneously, letting the joint cool naturally. Inspect the joint to ensure a shiny, smooth appearance, indicative of a good solder joint.
Utilizing Accessories and Maintenance Tools
To enhance your soldering experience and prolong the life of your Weller soldering iron, incorporating accessories and maintenance tools is crucial. Some essential items include:
- Soldering Stands: Provides a secure place to rest your soldering iron, preventing accidents and damage to your workspace.
- Brass Sponges and Wet Sponges: Essential for cleaning the soldering tip, ensuring optimal performance.
- Solder Wick and Solder Sucker: Tools for desoldering, helping to remove solder from joints when corrections are needed.
- Tip Tinner: A compound used to clean and re-tin the soldering iron tip, crucial for maintaining tip health.
Implementing Advanced Techniques and Tips
Once you’ve mastered the basics, implementing advanced techniques and tips can elevate your soldering skills to a professional level.
Mastering the Art of Soldering Small Components
Soldering small components, such as SMD (Surface Mount Device) parts, requires precision and steadiness. Using a Weller soldering station with temperature control and a fine tip can significantly enhance your ability to tackle these delicate tasks. Employing flux can also aid in achieving clean and strong solder joints on small components.
Avoiding Common Soldering Mistakes
Common soldering mistakes can hinder the performance and longevity of your electronic projects. Some mistakes to avoid include:
- Overheating: Prolonged exposure to heat can damage components. Use the appropriate temperature and avoid applying heat for extended periods.
- Insufficient Heating: Conversely, not applying enough heat can lead to cold solder joints, resulting in unreliable connections.
- Using Too Much or Too Little Solder: Striking the right balance is key; too much solder can lead to bridges and shorts, while too little can result in weak joints.
Where to Buy Weller Soldering Products
Finding a reliable supplier for Weller Soldering products is crucial to ensure you get genuine and high-quality equipment. Enrgtech, a trusted distributor of electronic components and tools, offers a wide range of Weller Soldering products. By choosing Enrgtech, you can rest assured that you are getting authentic Weller products, backed by excellent customer service and support.
Conclusion
Mastering the art of soldering with a Weller Soldering Iron requires understanding the basics, selecting the right tools, practicing proper technique, and utilizing accessories and maintenance tools. By following this comprehensive guide and avoiding common mistakes, you can enhance your soldering skills, ensuring durable and reliable connections in all your electronic projects. Whether you are a hobbyist or a professional, investing in Weller Soldering products and mastering these skills will undoubtedly pay off in the long run, and companies like Enrgtech are there to supply all the tools and accessories you need. With patience, practice, and the right equipment, soldering can become a rewarding and invaluable skill in your toolkit.


