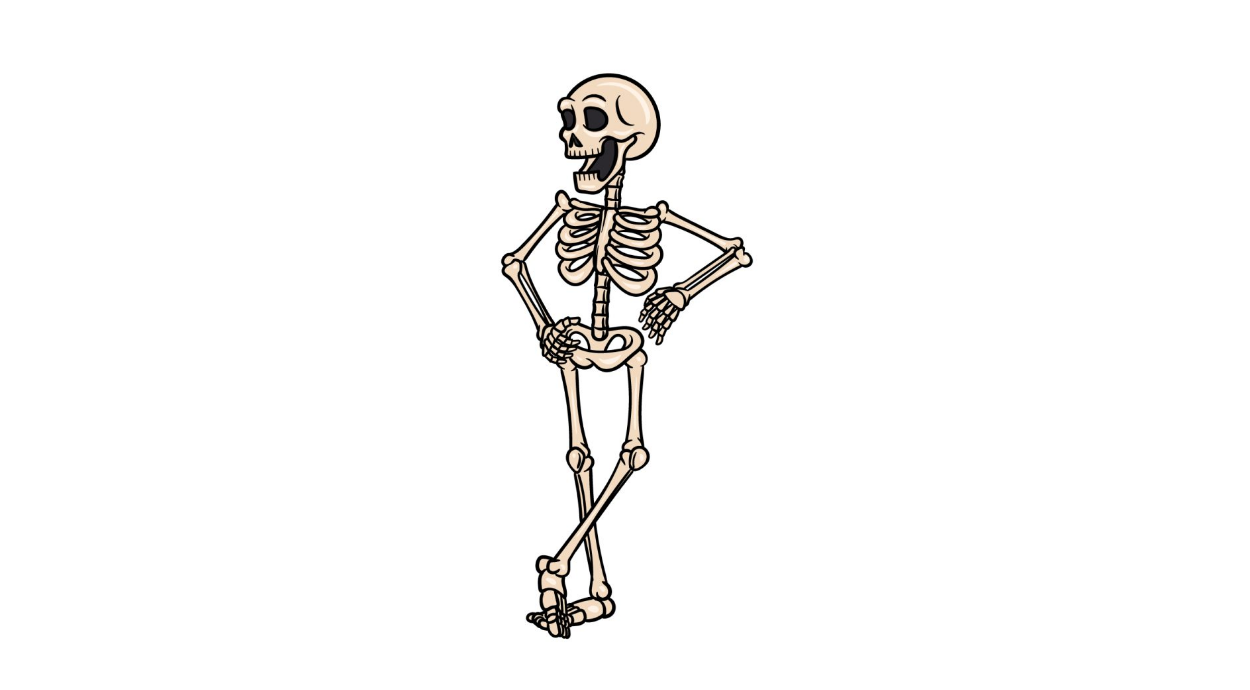
How to Draw A Cartoon Skeleton Easily
How to Draw A Cartoon Skeleton. The skeleton is one of the most essential structures in the body. Most living things have some skeleton that not only provides a solid structure for the body but also serves to protect sensitive organs.
Also, check our Cat Coloring Pages.
The skeleton is made up of many different bones and ligaments that are connected. This can make it difficult to draw correctly, even if it’s more stylized.
Even learning to draw a cartoon skeleton can be challenging if you don’t have a few steps to follow.
Luckily, this tutorial aims to help you achieve that while having fun.
Our step-by-step guide to drawing a cartoon skeleton in just 6 easy steps will show you how to recreate this fantastic design!
How to Draw A Cartoon Skeleton
Step 1
In this first step of our how-to draw a cartoon skeleton guide, we will tackle things from above. That means we start with the skull of this skeleton.
We’re going for a cartoon style to create an exaggerated facial expression.
Use a rounded line for the top of the skull, and then you can use smaller, more angular lines for the outlines of the face and teeth. The mouth will also be open, as shown in the reference image.
Then draw the details of the eyes, nose, and teeth in this outline. We will also add some curved lines on the side of the skull. Once we’ve drawn the small sections of the neck, we’re ready for step two of the tutorial!
Step 2
We’ll now go through this cartoon skeleton drawing and add the rib cage and part of the spine.
The rib cage will have a thin section in the middle, and then the ribs can be drawn using curved lines.
The backbone beneath this rib cage is then drawn from several connected segments, much like the neck.
Step 3
In this third step of our tutorial on drawing a cartoon skeleton, you will add arms.
The left arm rests on the hip while the right arm is stretched out, making it appear like the skeleton is leaning against something.
The arms are made up of several bones, and you should do your best to recreate them exactly as they look in our example.
Finish the work with the segmented hands, then proceed to the fourth part of the guide.
Step 4
Now for the following few sections of this cartoon skeleton, let’s focus on the bottom half of the drawing. First, we draw the hips.
The side panels are drawn with curved lines, and you can add small rounded shapes inside the outline to show where the holes are.
Next, add two more long bones from the hips for the upper leg halves. Once these are established, the next step of the guide allows us to add the final elements and details.
Step 5
In this fifth step of our tutorial on drawing a cartoon skeleton, we will add the final elements of the skeleton. This means we draw the bottom halves of the legs.
First, draw some long thin bones for the shins.
Next, we’ll draw feet at the ends of these bones, and just like other aspects of this cartoon skeleton, they’ll be drawn in different sections. Once you’ve completed those legs, you may even enjoy customizing this design further!
Step 6
You’re almost done with this cartoon skeleton drawing, but one aspect is missing. We’ll fix it in this last step when we finish with some colors!
We kept the colors more subtle and realistic in our reference image.
We used some black for the eyes, nose, and mouth and lighter shades of beige and brown for the skeletal bones.
If you like this more realistic approach, you can choose a few similar colors for your version, but feel free to use other colors you like the most!
Your Cartoon Skeleton Drawing is Finished!


